Melissa & Doug easels foster creativity! Detailed instructions‚ often with pictures‚ ensure smooth assembly‚ while the durable wooden design provides years of artistic fun.
The Deluxe Wooden Standing Art Easel is a popular choice‚ offering versatile features for budding artists and requiring careful assembly following provided guidance.
Prioritizing the instructions is crucial for a stable‚ safe easel‚ maximizing its potential for imaginative play and artistic exploration for children of various ages.
Overview of the Deluxe Wooden Standing Art Easel
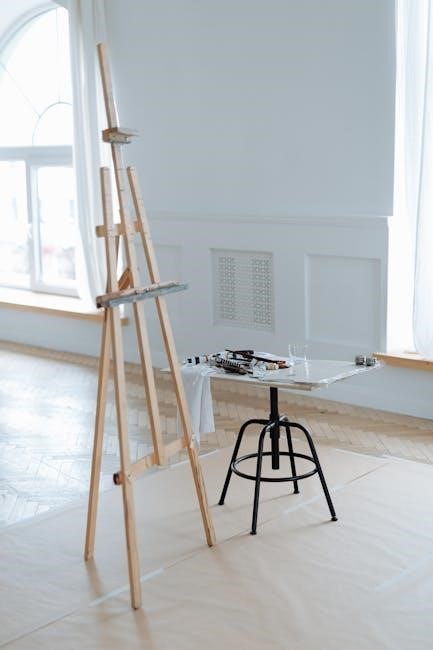
The Melissa & Doug Deluxe Wooden Standing Art Easel is a robust‚ double-sided art station designed to inspire creativity in children. It features a magnetic whiteboard on one side and a chalkboard on the other‚ offering diverse artistic avenues.
A paper roll holder allows for continuous drawing‚ while plastic trays provide convenient storage for art supplies. Height adjustability ensures comfortable use as children grow‚ and included instructions guide a successful assembly process.
This easel is built to withstand enthusiastic use‚ promoting hours of imaginative play and artistic expression.
Importance of Following Instructions
Adhering to the Melissa & Doug assembly instructions is paramount for a structurally sound and safe art easel; The detailed‚ step-by-step guidance ensures correct alignment of components‚ preventing instability or potential hazards during use.
Skipping steps or misinterpreting diagrams can lead to difficulties and compromise the easel’s longevity.
Proper assembly‚ as outlined‚ guarantees a secure and enjoyable artistic experience for your child‚ maximizing the product’s value and safety features.
Unboxing and Parts Identification
Carefully unpack all components‚ referencing the parts list in the instructions. Verify all wooden pieces‚ screws‚ and bolt caps are present before starting assembly.
Checking the Package Contents
Melissa & Doug provides a detailed parts list within the instructions; cross-reference this with your package contents immediately upon unboxing. Ensure you have all wooden frame pieces‚ side panels‚ the base‚ feet‚ a paper roll‚ and all hardware – screws‚ bolts‚ and crucially‚ the Allen wrench.
Missing parts will halt assembly‚ so a thorough check prevents frustration. Note any discrepancies and prepare to contact customer support if needed‚ referencing the product details.
Identifying All Components (Screws‚ Bolts‚ Wood Pieces)
The Melissa & Doug easel utilizes various screws and bolts for secure assembly. Familiarize yourself with each type – longer bolts for the frame‚ shorter for panels. Identify the side panels‚ base pieces‚ and the easel frame itself.
The instructions often depict each component clearly. Color-coded bolt caps are included for a finished look‚ so separate these as well. Proper identification streamlines the building process.
Tools Required for Assembly
An Allen wrench is included for assembly. A screwdriver can be helpful‚ but isn’t essential. Protect surfaces during building‚ as noted in instructions!
Allen Wrench Included
Melissa & Doug thoughtfully includes a dedicated Allen wrench specifically designed for assembling the Deluxe Wooden Standing Art Easel. This eliminates the immediate need for additional tools‚ streamlining the assembly process. The instructions clearly indicate where and how to utilize this wrench for securing various components.
Ensure the wrench is fully inserted into the bolt heads to prevent stripping. It’s a key element for proper tightening and a stable easel structure‚ as highlighted in the provided documentation.
Optional Tools (Screwdriver)
While the included Allen wrench is sufficient for most of the assembly‚ a screwdriver can be optionally helpful‚ particularly when applying the decorative bolt caps. These caps snap over the bolt heads for a finished look‚ and a small flathead screwdriver can aid in their secure placement.
The instructions don’t mandate a screwdriver‚ but it can offer greater precision during the final stages‚ enhancing the easel’s aesthetic appeal and overall build quality;
Step-by-Step Assembly Guide
Begin by carefully attaching the hinges to the easel frame‚ then connect the side panels‚ ensuring proper alignment. Secure the base and feet for stability!
Adjust the height and install the paper roll holder‚ finishing by attaching the plastic trays for art supplies.
Attaching the Hinges to the Easel Frame
Begin by locating the hinges and the corresponding pre-drilled holes on the easel frame pieces. Insert the plastic pads into the hinges before screwing them in.
Use the included Allen wrench to carefully tighten the screws‚ securing the hinges firmly to the frame. Ensure the hinges are aligned correctly for smooth folding and unfolding of the easel.
Avoid over-tightening the screws‚ as this could damage the wood. Properly attached hinges are crucial for the easel’s stability and functionality.
Connecting the Side Panels
With the hinges attached‚ carefully align the side panels with the easel frame. Ensure the pre-drilled holes match up for a secure connection. Use the provided screws and Allen wrench to join the panels to the frame.
Take your time and gently tighten the screws‚ checking for proper alignment as you go. Avoid forcing the pieces together‚ as this could cause damage.
A snug fit is essential for the easel’s overall stability and prevents wobbling during use. Double-check all connections before proceeding.
Securing the Base and Feet
Once the side panels are connected‚ attach the base to the easel frame using the designated screws and the Allen wrench. Ensure the base is flush with the frame for optimal stability.
Next‚ install the feet onto the base‚ again verifying proper alignment before tightening the screws. These feet prevent scratching of your floors and provide a stable foundation.
Confirm all screws are firmly tightened‚ but avoid over-tightening‚ which could strip the wood. A secure base is vital for safe and enjoyable use of the easel.
Adjusting the Easel Height
The Melissa & Doug easel features adjustable height levels to accommodate growing artists. Locate the height adjustment mechanism‚ typically involving side supports with pre-drilled holes.
Select the desired height based on your child’s size‚ ensuring comfortable reach to the art surface. Insert the support pegs into the corresponding holes on both sides of the easel.
Double-check that the pegs are securely locked into place before allowing a child to use the easel. This locking mechanism prevents accidental height adjustments during art creation.
Installing the Paper Roll Holder
The paper roll holder typically consists of two brackets that attach to the top of the easel frame. Align the brackets with the pre-drilled holes and secure them using the provided screws.
Ensure the brackets are firmly attached to prevent the paper roll from slipping during use. Once the brackets are in place‚ slide the paper roll onto the holder.
Adjust the roll so that a sufficient length extends beyond the easel for easy tearing. This setup allows for continuous artistic expression with a fresh canvas readily available.
Attaching the Plastic Trays
The plastic trays slide or clip onto the lower portion of the easel frame‚ typically on either side. Locate the designated slots or attachment points on both the trays and the easel.
Gently slide or clip the trays into place‚ ensuring they are securely fastened to prevent them from falling off during use. These trays provide convenient storage for art supplies.
Keeping paints‚ brushes‚ and other materials organized and within easy reach for young artists‚ enhancing their creative experience.

Using Bolt Caps for a Finished Look
Bolt caps conceal screws for safety and aesthetics. Use any color during assembly‚ snapping them onto the bolt heads for a polished‚ professional appearance.
Applying caps during assembly streamlines the process‚ creating a neat and secure finish.
Color-Coding Bolt Caps
Melissa & Doug provides a variety of colored bolt caps with the easel‚ though the instructions note you can use any color during assembly. While not essential for structural integrity‚ color-coding can be a fun organizational element.
You might choose to match cap colors to specific easel sections‚ or let children participate in selecting colors for a personalized touch. Ultimately‚ the color choice is purely aesthetic and doesn’t impact functionality.
Applying Bolt Caps During Assembly
To apply the bolt caps‚ simply press them firmly onto the exposed bolt heads after tightening each screw during assembly. This provides a finished look and prevents accidental scratches.
The instructions don’t specify a particular order‚ so you can cap bolts as you go‚ or wait until the entire easel is constructed. Ensure a snug fit for each cap‚ concealing the hardware effectively.
Safety Precautions During Assembly
Adult assembly is required! Protect flooring during assembly to avoid scratches‚ and ensure a stable workspace for safe construction.
Always follow the instructions carefully‚ and keep small parts away from children during the building process.
Adult Assembly Required
Melissa & Doug explicitly states that this easel requires full adult assembly. This is due to the presence of small parts and the need for moderate force when connecting the wooden components.
Attempting assembly without adult supervision could lead to incorrect construction‚ potential instability‚ or even injury from the hardware. Carefully review all instructions before beginning‚ and ensure a safe‚ clear workspace.
The process involves aligning pieces and securing them with screws‚ demanding dexterity and strength best suited for an adult.
Protecting Surfaces During Assembly
To avoid scratching floors or furniture during assembly‚ Melissa & Doug recommends working on a protected surface. A drop cloth‚ blanket‚ or cardboard sheet will effectively shield your floors from potential damage.
The easel components‚ while crafted from wood‚ can still cause scuffs if dragged across hard surfaces. Careful handling and a protective layer are essential throughout the entire assembly process.
This simple precaution ensures a clean and damage-free experience‚ preserving both your floors and the easel’s finish.
Adjusting Easel Height for Different Ages
Melissa & Doug easels offer adjustable heights! Select a level where your child can comfortably reach the art surface‚ promoting good posture and creativity.
Ensure the height adjustment mechanism is securely locked after each change‚ guaranteeing stability during artistic endeavors for various age groups.
Determining Appropriate Height Levels
Determining the correct height is vital for comfortable and engaging art sessions. Consider your child’s height when adjusting the easel; the surface should be reachable without straining or hunching.
Younger artists benefit from lower settings‚ encouraging exploration and preventing fatigue. As they grow‚ gradually increase the height to support proper posture and expanding artistic skills.
Observe your child while they create – if they seem uncomfortable‚ readjust the easel until a natural and ergonomic position is achieved‚ fostering a positive art experience.
Locking the Height Adjustment Mechanism
Locking the height adjustment mechanism is crucial for stability and safety during use. Ensure the locking knobs or levers are firmly tightened after reaching the desired height.
Regularly check these locks‚ especially with active children‚ to prevent accidental slippage and potential hazards. A secure lock maintains a consistent working surface.
Properly engaged locks guarantee the easel remains at the chosen height‚ fostering a safe and focused creative environment for your young artist’s artistic endeavors.
Paper Roll Installation and Usage
Loading a new paper roll is simple; slide it onto the holder. Tearing paper requires a gentle pull‚ providing a fresh canvas for artistic expression!
The Melissa & Doug easel’s paper roll system encourages continuous creativity without messy stacks of loose paper.
Loading a New Paper Roll
To begin‚ locate the paper roll holders on either side of the easel’s upper frame. Carefully slide one end of the new paper roll onto one of the spindles‚ ensuring it’s securely fitted.
Next‚ gently guide the roll across to the opposite spindle and slide that end on as well. The roll should now be held firmly in place‚ ready for artistic adventures! Ensure the paper feeds smoothly.
Tearing Paper from the Roll
To tear paper‚ gently pull the paper down from the roll to your desired length. Utilize the built-in paper tear bar‚ if equipped‚ by pressing the paper against it and applying a firm‚ downward motion.
Alternatively‚ you can tear the paper by hand‚ ensuring a clean break. Discard any scraps responsibly and enjoy a fresh canvas for your child’s creative expression!
Cleaning and Maintenance
Regularly wipe down the Melissa & Doug easel surfaces with a damp cloth to remove art supplies residue and maintain a clean‚ enjoyable creative space.
Store the easel in a dry location when not in use to prolong its life and ensure continued artistic adventures.
Wiping Down Surfaces
To effectively clean the Melissa & Doug easel‚ use a soft‚ damp cloth. Avoid abrasive cleaners‚ as they can damage the wood finish. Gently wipe all surfaces – the whiteboard‚ chalkboard‚ and wooden frame – to remove paint‚ marker‚ or crayon marks.
For stubborn marks‚ a slightly soapy water solution can be used‚ followed by wiping with a clean‚ damp cloth to remove any soap residue. Ensure the easel is thoroughly dried after cleaning.
Storing the Easel
When not in use‚ the Melissa & Doug easel can be folded for more compact storage. Ensure it’s stored in a dry location to prevent wood damage. Avoid storing it in direct sunlight or extreme temperatures.
Consider covering the easel with a cloth to protect it from dust and scratches during storage. Regularly check the hardware for tightness before storing to maintain stability upon re-use.

Troubleshooting Common Assembly Issues
Missing parts? Contact Melissa & Doug support. Difficulty aligning pieces? Double-check the instructions and ensure proper orientation before applying force.
Missing Parts
If components are missing from your Melissa & Doug easel kit‚ don’t attempt to force assembly! Immediately contact Melissa & Doug customer support via their website or phone line (1-800-284-3948).
Have your order information and the specific part number (from the instructions) ready to expedite the process. They are known for promptly sending replacement parts to ensure a complete and enjoyable building experience.
Difficulty Aligning Pieces
If pieces don’t align during assembly‚ double-check the instructions and ensure you’re using the correct screws and bolts for that step. Avoid forcing connections‚ as this could damage the wood.
Loosen previously tightened screws slightly to allow for adjustments. Melissa & Doug’s instructions emphasize careful alignment‚ often with visual aids‚ to ensure a sturdy and correctly assembled easel.

Warranty Information
Melissa & Doug offers a warranty on their products; details are available on their website or by contacting customer support for easel-related issues.
Retain your proof of purchase for warranty claims‚ ensuring a smooth resolution process if any defects arise during normal use.
Melissa & Doug Warranty Details
Melissa & Doug stands behind the quality of their products‚ including the Deluxe Wooden Standing Art Easel. While specific terms can vary‚ their warranty generally covers manufacturing defects in materials and workmanship.
This doesn’t typically cover normal wear and tear‚ misuse‚ or damage resulting from improper assembly. Proof of purchase is essential for any claim. Contacting their customer support directly is the best way to understand the full scope of coverage for your specific easel.
Contacting Customer Support
For assistance with Melissa & Doug easel assembly‚ missing parts‚ or warranty inquiries‚ their customer support team is readily available. You can reach them by phone at 1-800-284-3948. Alternatively‚ visit the official Melissa & Doug website for a comprehensive FAQ section and online contact form.
Having your order number and details about the assembly issue ready will expedite the process‚ ensuring a swift resolution to any concerns regarding your new art easel.

Additional Accessories
Enhance the easel experience with compatible art supplies like paints‚ crayons‚ and paper! Melissa & Doug also offers expansion packs for added creative fun.
Consider accessory kits designed specifically for the easel‚ providing a convenient way to stock up on essential art materials.
Compatible Art Supplies
Melissa & Doug easels work wonderfully with a wide range of art materials! Consider washable paints‚ chunky crayons‚ and vibrant markers to spark creativity. Large paper rolls‚ construction paper‚ and even coloring books are excellent choices.
Don’t forget paintbrushes of various sizes‚ sponges for unique textures‚ and safety scissors for collage projects. Play-Doh or modeling clay can also be used on the easel’s surface for three-dimensional art!
Expansion Packs and Add-ons
Enhance your Melissa & Doug easel experience with accessory kits! These often include additional paint cups‚ brushes‚ and a wider variety of art supplies to inspire creativity.
Look for expansion packs featuring themed art projects‚ like animals or vehicles‚ to guide artistic exploration. Magnetic accessories can also add a new dimension to play‚ offering interactive fun.
Consider a paper refill pack to keep the artistic flow going‚ ensuring endless opportunities for drawing and painting!
Resources and Support
Melissa & Doug’s official website offers detailed assembly instructions and support. Helpful assembly videos and tutorials are also readily available online for guidance.
Customer support can assist with missing parts or assembly challenges‚ ensuring a positive experience with your new art easel.
Official Melissa & Doug Website
Melissa & Doug’s website (melissaanddoug.com) is the primary resource for product information‚ including downloadable assembly instructions for the Deluxe Wooden Standing Art Easel.
You’ll find detailed diagrams and step-by-step guides to aid in proper construction. The site also features FAQs addressing common assembly issues and provides contact information for customer support if further assistance is needed.
Explore the website for compatible art supplies and expansion packs to enhance your child’s creative experience with the easel!
Assembly Videos and Tutorials
Numerous online video tutorials demonstrate the assembly process for the Melissa & Doug Deluxe Wooden Standing Art Easel‚ offering a visual guide alongside written instructions.
Platforms like YouTube host helpful videos showcasing each step‚ from attaching hinges to securing the base‚ making assembly easier to follow.
These visual aids are particularly useful for understanding alignment and proper component placement‚ ensuring a sturdy and safe easel for creative play.