Installing a Hotpoint dishwasher requires careful planning and execution to ensure optimal performance and safety․ This guide provides a comprehensive walkthrough of the process․
Overview of Hotpoint Dishwashers
Hotpoint dishwashers are renowned for their reliability‚ efficiency‚ and innovative features‚ making them a popular choice for modern kitchens․ Available in freestanding‚ fully integrated‚ and partially integrated models‚ they cater to diverse kitchen setups․ Designed with user-friendly controls and energy-saving technologies‚ Hotpoint dishwashers ensure optimal cleaning performance while minimizing water and energy consumption․ Their robust construction and advanced features‚ such as multiple wash cycles and quiet operation‚ enhance user convenience․ Proper installation and maintenance are essential to maximize their functionality and lifespan‚ ensuring years of dependable service․
Importance of Proper Installation
Proper installation of a Hotpoint dishwasher is crucial for ensuring safety‚ efficiency‚ and optimal performance․ Incorrect installation can lead to issues such as water leaks‚ electrical hazards‚ and reduced appliance lifespan․ It guarantees compliance with safety standards‚ preventing risks like fire or electrical shocks․ A well-installed dishwasher also operates more efficiently‚ saving energy and water․ Additionally‚ it validates the warranty‚ ensuring coverage for repairs․ Proper installation ensures quiet operation‚ prevents damage to surrounding surfaces‚ and maintains the dishwasher’s longevity‚ making it a critical step for homeowners․

System Requirements and Compatibility
Ensure compatibility with electrical‚ plumbing‚ and ventilation systems․ Verify dimensions match installation space and align with home infrastructure for optimal performance and safety․
Electrical Requirements
Ensure your Hotpoint dishwasher is connected to a suitable power supply․ The dishwasher requires a dedicated 120V‚ 60Hz electrical circuit․ Verify the electrical system meets the specified voltage and current ratings in the manual․ Proper grounding is essential to prevent electrical hazards․ Use a grounded metal wiring system and avoid shared circuits with high-power appliances․ Before installation‚ check the circuit for correct voltage‚ amperage‚ and grounding to ensure safety and optimal performance․ Always refer to the user manual or consult a professional if unsure․
Water Supply and Drainage Needs
Ensure a stable water supply and proper drainage system for your Hotpoint dishwasher․ Connect the dishwasher to a cold water supply using a high-pressure hose․ The recommended water pressure is between 0․1 and 10 bar․ For drainage‚ install a 1․5-meter hose connected to a sink drain or a dedicated dishwasher outlet․ Regularly inspect hoses for leaks and ensure the drain hose is not kinked or blocked․ Proper installation prevents water damage and ensures efficient operation․ Always follow the manual’s specifications for optimal performance and safety․
Space and Dimension Considerations
Ensure the installation area matches your Hotpoint dishwasher’s dimensions․ Measure the space carefully to fit the unit snugly․ Standard dishwashers are 60cm wide and 85cm tall‚ but dimensions may vary by model․ Allow at least 5cm of clearance around the dishwasher for proper airflow and maintenance access․ Verify the floor is level to prevent imbalance and secure the dishwasher firmly to avoid movement during operation․ Always check the manual for specific model measurements to ensure a perfect fit and compliance with installation guidelines․
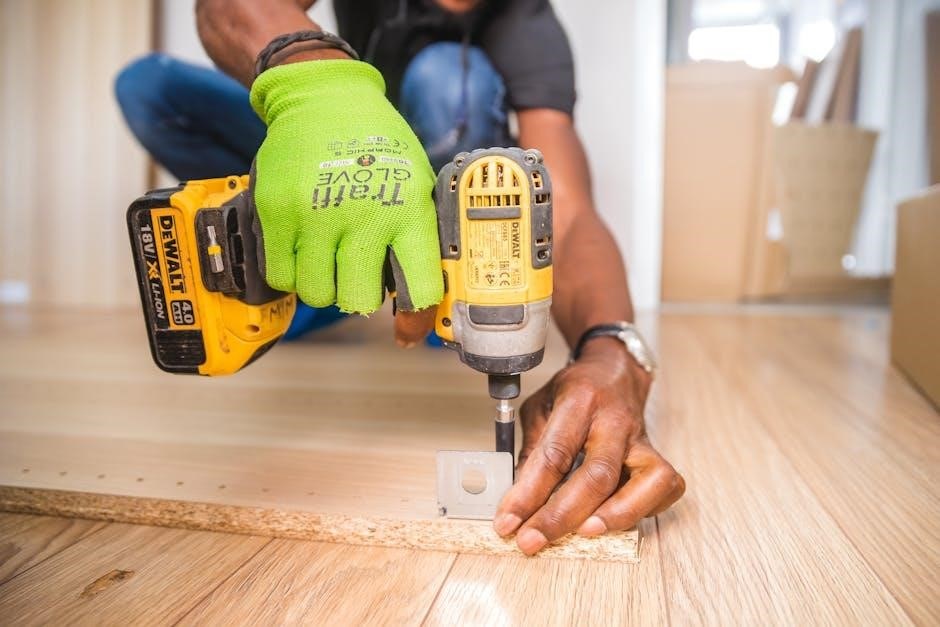
Tools and Materials Needed
Essential tools include an adjustable wrench‚ screwdrivers‚ and a spirit level․ Materials needed are water supply lines‚ drainage hose‚ and electrical connections for a secure setup․
Essential Tools for Installation
Key tools needed for installing a Hotpoint dishwasher include an adjustable wrench for connecting water lines‚ screwdrivers for securing the unit‚ and a spirit level to ensure proper leveling․ Pliers may be useful for tightening connections‚ while a drill could be necessary for creating mounting holes․ A utility knife can help with cutting hoses or insulation․ Ensure all tools are readily available to streamline the installation process and avoid delays․ Proper tools are crucial for a safe and efficient setup of your dishwasher․
Required Materials and Accessories
Essential materials for Hotpoint dishwasher installation include water supply lines‚ drainage hoses‚ and electrical connections․ You’ll need mounting brackets and screws for securing the unit․ A water filter may be necessary if your supply has high sediment or hardness․ Ensure you have levelling feet for stability and anti-vibration pads․ Seals and gaskets are crucial for leak prevention․ Adapters may be required for compatibility with existing plumbing․ Always refer to the user manual for specific accessories recommended for your model to ensure a seamless installation process․

Site Preparation
Site preparation involves checking the installation area is clear‚ ensuring the floor is level‚ and preparing all necessary proper electrical and water connections for a smooth setup process․
Assessing the Installation Location
Assessing the installation location ensures the dishwasher fits perfectly and functions optimally․ Measure the space to confirm dimensions match the dishwasher’s size․ Ensure the floor is level and stable using a spirit level․ Check proximity to water supply‚ drainage‚ and electrical connections․ Verify proper ventilation to prevent moisture buildup․ Look for any obstacles or plumbing issues that may complicate installation․ Ensure the area is clear and accessible for easy placement and future maintenance․ Proper assessment guarantees a secure and efficient setup‚ avoiding potential issues during operation․
Ensuring Proper Ventilation
Proper ventilation is crucial during Hotpoint dishwasher installation to prevent moisture buildup and ensure efficient operation․ Ensure the installation area is well-ventilated to dissipate steam effectively․ Open nearby windows or use an exhaust fan to reduce humidity․ Proper airflow prevents mold growth and maintains a dry environment․ Additionally‚ check that the dishwasher’s venting system is unobstructed and functioning correctly․ Regularly inspect ventilation pathways to avoid blockages and ensure optimal performance․ Adequate ventilation enhances safety and extends the appliance’s lifespan․
Preparing Electrical and Water Connections
Before installing your Hotpoint dishwasher‚ ensure the electrical and water connections are prepared․ Connect the dishwasher to a grounded metal wiring system and a 120V‚ 60Hz power supply․ Use a dedicated 20-amp circuit to avoid overloading․ For water connections‚ install a shut-off valve and use a 3-foot flexible hose kit․ Ensure the water supply lines are properly sized and free from leaks․ Check the water pressure‚ which should be between 4 and 120 psi for optimal performance․ Refer to your manual for specific electrical and plumbing requirements to ensure a safe and secure setup․

Unpacking and Inspecting the Dishwasher
Unpack the dishwasher carefully to avoid damage․ Inspect for visible damage or missing parts․ Ensure all components‚ like racks and hoses‚ are included and intact before proceeding․
Unpacking the Dishwasher Safely
Unpacking your Hotpoint dishwasher requires care to avoid damage․ Wear gloves and place the appliance on a stable surface․ Open the box carefully‚ ensuring the dishwasher is secure․ Inspect for visible damage or dents․ Remove packaging materials gently to prevent scratching․ Check for loose parts and verify all accessories are included․ If any damage is found‚ contact the supplier immediately․ Refer to the manual for specific unpacking instructions tailored to your model․ Handle the dishwasher with care to prevent accidental dents or scratches during the process․
Inspecting for Damage or Missing Parts
Before installation‚ thoroughly inspect your Hotpoint dishwasher for any visible damage or missing components․ Check the exterior for dents‚ scratches‚ or cracks․ Open the door and examine the interior‚ including racks‚ sprayers‚ and filters․ Ensure all accessories‚ like the power cord‚ water hoses‚ and mounting hardware‚ are included and undamaged․ Consult the manual for a detailed inventory list․ If any parts are missing or damaged‚ contact the supplier immediately to avoid installation delays․ A pre-installation inspection ensures a smooth setup process․
Installation Steps
Position the dishwasher‚ level it‚ and secure it to ensure stability and proper operation․ Follow the manufacturer’s instructions for precise alignment and connection procedures․
Positioning the Dishwasher
Place the dishwasher near a water supply and drainage point‚ ensuring it fits the space and is level to prevent vibration․ Use adjustable feet to stabilize it․ Position away from direct sunlight and heat sources for optimal performance․ Allow clearance around the unit for maintenance access and ensure proper alignment with surrounding surfaces for a seamless installation․
Levelling the Dishwasher
Ensure the dishwasher is perfectly level during installation to prevent vibration and noise․ Use a spirit level to check both side-to-side and front-to-back alignment․ Adjust the adjustable feet to achieve balance․ Tighten the locking nuts securely once the desired level is reached․ Improper levelling can lead to poor performance and potential damage․ Always refer to the user manual for specific levelling instructions tailored to your Hotpoint model․
Securing the Dishwasher
After levelling‚ secure the dishwasher to prevent movement during operation․ Use the provided anti-tip brackets or stabilisation kit to anchor the appliance to adjacent countertops or the floor․ Ensure all screws and brackets are tightly fastened to avoid vibration or shifting․ Double-check the unit’s stability by gently tugging on it․ Proper securing ensures safe and quiet operation‚ preventing potential damage to the dishwasher or surrounding surfaces․

Connecting Water and Drainage
Connect the water supply hoses to the dishwasher and home water supply․ Attach the drain hose to the sink drain or garbage disposal․ Ensure all connections are secure and not kinked for proper function․
Installing Water Supply Lines
Begin by locating the water shut-off valve near the dishwasher․ Connect the water supply lines to the dishwasher’s inlet valve‚ ensuring they are securely attached․ Use copper or PVC pipes‚ depending on your setup․ Tighten all connections firmly to prevent leaks․ Turn on the water supply and check for any signs of moisture or leaks․ Ensure the water pressure matches the dishwasher’s specifications for optimal performance․ If unsure‚ consider consulting a professional plumber to avoid potential issues․
Connecting the Drain Hose
Attach the drain hose to the dishwasher’s drain outlet‚ securing it with the provided clamp․ Route the hose to the sink drain or garbage disposal‚ ensuring no kinks or blockages․ Elevate the hose slightly to prevent backflow․ If connecting to a garbage disposal‚ attach the hose to the disposal’s inlet․ Tighten all connections firmly․ Test by running a short cycle to ensure proper drainage and check for leaks around connections․ Proper installation ensures efficient drainage and prevents water from backing up into the dishwasher․
Ensuring Proper Water Pressure
Check that the water supply lines are properly connected and not kinked or blocked․ Ensure the water valves are fully open to provide adequate pressure․ For optimal performance‚ maintain a water pressure range of 4-80 psi․ If water pressure is too low‚ consider installing a booster pump․ Secure all connections tightly to prevent leaks․ After installation‚ run a test cycle to verify water flow and pressure․ Proper water pressure ensures efficient cleaning and prevents damage to the dishwasher or its components․

Electrical Connections
Ensure the dishwasher is connected to a grounded electrical outlet‚ matching the specified voltage and power requirements․ Always follow safety guidelines to prevent electrical hazards and ensure proper function․
Connecting the Power Cord
Connect the dishwasher’s power cord to a grounded electrical outlet‚ ensuring it matches the specified voltage and power requirements․ Securely plug in the cord‚ avoiding twists or pinching․ Ensure the outlet is easily accessible for safety․ Always follow the manufacturer’s guidelines and safety precautions to prevent electrical hazards․ If unsure‚ consult the user manual or contact a licensed electrician․ Proper connection ensures safe and efficient operation of your Hotpoint dishwasher․
Ensuring Proper Grounding
Proper grounding is essential for safety and optimal performance of your Hotpoint dishwasher․ Connect the appliance to a grounded electrical outlet to prevent electrical shocks and ensure safe operation․ Check the power cord for a grounding wire‚ typically identifiable by its green color․ Ensure all connections are secure and comply with local electrical regulations․ If unsure‚ consult the user manual or a licensed electrician․ Proper grounding protects both the appliance and users from potential electrical hazards‚ ensuring reliable and safe functionality․
Testing the Electrical Connection
After connecting the dishwasher to the power supply‚ test the electrical connection to ensure it functions correctly․ Use a multimeter to verify that the outlet provides the correct voltage‚ typically 120V for most models․ Check that all wires are securely connected and not damaged․ Turn on the dishwasher and run a short cycle to confirm proper operation․ If issues arise‚ consult the user manual or contact a licensed electrician․ Proper electrical testing ensures safety and prevents potential malfunctions‚ guaranteeing efficient and reliable dishwasher performance․
Testing the Installation
After installation‚ run a test cycle to ensure the dishwasher operates correctly․ Check for leaks‚ verify water and electrical connections‚ and confirm all functions work as expected․
Running a Test Cycle
Once installed‚ run a test cycle to ensure proper functionality․ Select a short cycle with no dishes‚ using a small amount of detergent․ Monitor for leaks‚ unusual noises‚ or errors․ Check water inlet and drain hoses for secure connections․ Verify the dishwasher completes the cycle without interruption․ If issues arise‚ consult the user manual or contact support․ This step confirms everything works as intended‚ providing peace of mind for daily use․
Checking for Leaks
After installation‚ check for leaks by inspecting all water connections‚ including the inlet and drain hoses․ Run a short cycle and monitor for water droplets or puddles․ Ensure the dishwasher is properly leveled‚ as misalignment can cause leaks․ Inspect the door seals and gasket for tightness and cleanliness․ Regularly check the base of the dishwasher for water accumulation․ Addressing leaks promptly prevents damage and ensures efficient operation․ Always refer to the user manual for specific guidance on leak detection and resolution․
Verifying Proper Functionality
After completing the installation‚ run a test cycle to ensure the dishwasher operates smoothly․ Check for unusual noises‚ excessive vibration‚ or error codes․ Verify that water flows evenly and the heating element functions correctly․ Ensure the detergent dispenser opens and closes properly during the cycle․ Confirm that all program settings work and the dishwasher completes each phase without interruptions․ Finally‚ inspect the dishes to ensure they are clean and dry‚ confirming the dishwasher is performing as expected․ Proper functionality ensures efficiency and longevity of the appliance․
Maintenance and Care
Regular maintenance ensures your Hotpoint dishwasher operates efficiently․ Clean filters‚ check for blockages‚ and run cleaning cycles to remove grease and food residue․
Regular Cleaning and Maintenance
Regular cleaning and maintenance are essential to ensure your Hotpoint dishwasher runs efficiently and effectively․ Start by cleaning the filter after each use to remove food particles and debris․ Check and clear blockages in the spray arms and drain hose to maintain proper water flow․ Run a cleaning cycle with a dishwasher cleaner or hot water to remove grease and odors․ Additionally‚ wipe down the exterior and door seals to prevent mold and mildew buildup․ Always refer to your specific model’s manual for detailed maintenance instructions․
Troubleshooting Common Issues
Troubleshooting common issues with your Hotpoint dishwasher can save time and prevent costly repairs․ If your dishwasher isn’t starting‚ check the power supply and ensure the child lock is off․ For poor cleaning results‚ ensure proper detergent usage and check for blockages in spray arms or filters; Leaks may indicate worn seals or loose connections․ Strange noises could be due to faulty pumps or debris in the drain․ Regularly cleaning filters and checking for error codes can help identify and resolve problems quickly․ Always refer to your manual for model-specific solutions․
Proper installation and maintenance ensure your Hotpoint dishwasher operates efficiently․ Always follow guidelines‚ consult manuals‚ and seek support for optimal performance and longevity of your appliance․
Final Checklist for Installation
Ensure all electrical connections are secure and grounded․ Verify water supply lines are properly installed and leak-free․ Check drainage hose connections and ensure correct ventilation․ Level the dishwasher accurately for stable operation․ Test the appliance with a short cycle to confirm functionality․ Inspect for any leaks or irregular noises․ Refer to the user manual for specific model adjustments․ Double-check all safety precautions and manufacturer guidelines․ Consult a professional if unsure about any step․ Proper installation ensures efficient performance and longevity of your Hotpoint dishwasher․
Warranty and Support Information
Hotpoint dishwashers come with a manufacturer’s warranty‚ ensuring coverage for parts and labor against defects․ Register your appliance to activate the warranty and receive dedicated support․ For troubleshooting or maintenance‚ refer to the user manual or visit Hotpoint’s official website for downloadable guides and FAQs․ Contact customer service for assistance with repairs or replacements․ Extended warranties may also be available for added protection․ Hotpoint’s commitment to quality and customer care ensures reliable service and support throughout your dishwasher’s lifespan․